
I’ve missed out on last weeks weekly post because we’ve been busy with staging our inspiration shoots for our mood boards! We’ve come up with 3 new ones – a Bright Wedding Cake Table, a Pastel Candy Buffet, and a Cookie Bar!
In the next coming weeks, we will be sharing with you the tutorials on how you can DIY these setups for your own events.
So, with the list of new tutorials in store for all of my lovely readers, I’m starting off with the sunny and bright Wedding Cake Table tutorial. And.. I’ll let you in to a personal secret – I’m secretly intimidated by colors, especially bright ones!

So this whole look is perfect for those that are looking to have a bright wedding cake table, dessert buffet, or even a photo backdrop (imagine all the possibilities!). The key to this look is to keep the basics simple and amp it up with bursts of color using crepe paper tassels and confetti. And here’s the colour palette if you need it!

If you’re like me, and if bright colors tend to intimidate you, I’ll break the look into simpler components to show you how it works to compliment each other.
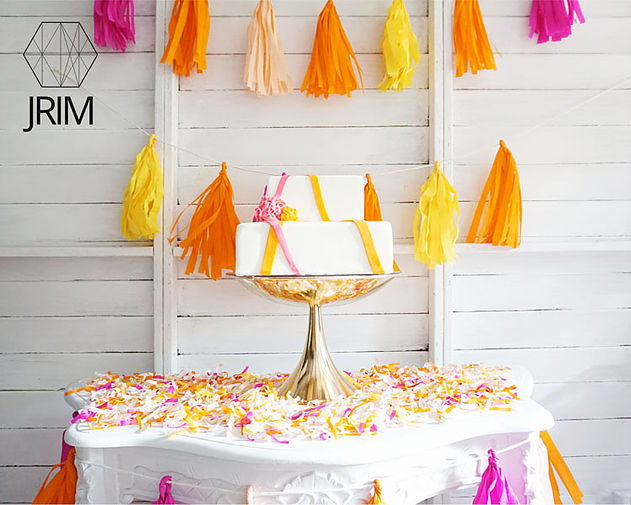
There’s basically 4 simple components to this look; the table, the cake stand, the cake and the crepe paper embellishments. The first 3 of these components are kept simple so that when you inject color into the setup with the embellishments, it wouldn’t look like you’ve gone overboard. And that ladies and gents, is the big secret!
So, to see the step by step guide on how to set it up, just watch the GIF below:

Instructions:
- Place the table in the desired location.
- Secure the first strand of tassels on the table, the second and third one on the walls. Place them to your liking, I prefer a symmetrical look rather than an assymmetrical placement. If you noticed, the top strand on the wall has more tassels than the one below it (I liked how the tassels looks like its tapering down towards the table).
- Sprinkle the confetti on the table top.
- Place the gold tray in the middle of the table top, and place the cake (that’s on a cake board) on the tray. Since you’re using a hantaran tray, you will need to use a cake board that’s slightly bigger than our tray to turn it into a cake stand as the tray does not have a flat surface.
- Once you’ve centered and tweaked everything to your liking, voila! A cake table that’s ready to impress and best of all, looks great in photos!
All you need is a plain backdrop (a white wall would be perfect), our Victorian Classic Table (in matte white), one of our Gold Trays, 3 strings of crepe paper tassels, and a bunch of crepe paper confetti! We’re releasing the crepe paper tassel tutorial next week, so watch out for that in case you need a step by step guide on how to make them. Keep scrolling down to see which of our rentals were used for this setup:
